In this article, we will demonstrate the process of connecting your Kali Linux virtual machine to a wireless network when using VMware Workstation as the hypervisor. This method will focus on cases where one is using a USB-based wireless/wi-fi adapter on the host machine. This approach is also referred to as USB passthrough and it allows the guest virtual machine to utilize USB devices that are connected to the host machine.
The first step in the process is to configure/edit the system-wide USB settings to ensure that specific features are enabled. To get to the system-wide USB settings on VMware Workstation, on the menu, we will click on Edit then click on Preferences. Once the Preference window pops up, we will click on the USB option, and then under Connections, we will select “Ask me what to do” as shown in the figure below.
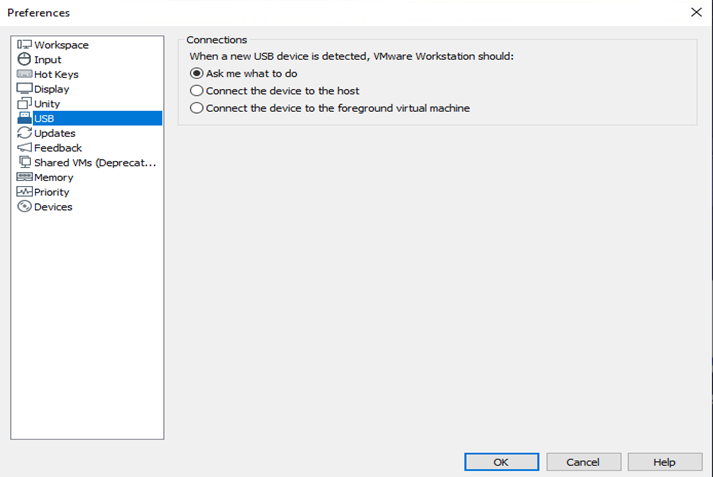
When a new USB device is detected, the “Ask me what to do” option will pop up a message asking you if you want to connect a USB device to your virtual machine. The message will appear whenever a USB device is connected to the host machine.
The next setting that we need to configure is for the individual virtual machine we are interested in or are working with. In our case, we have a Kali Linux machine that we would like to connect to our wireless/wi-fi network via the USB-based wireless adapter. We will right-click on the Kali virtual machine and select the settings option. In the Virtual Machine Settings window that pops up, we will ensure that there is a hardware device named USB Controller. If we do not see one, we will add one using the add tab. As shown in the below figure, the USB Controller device is already added and present for the Kali Linux machine, therefore, when we try to add another one, we see that the “Finish” tab is grayed out.
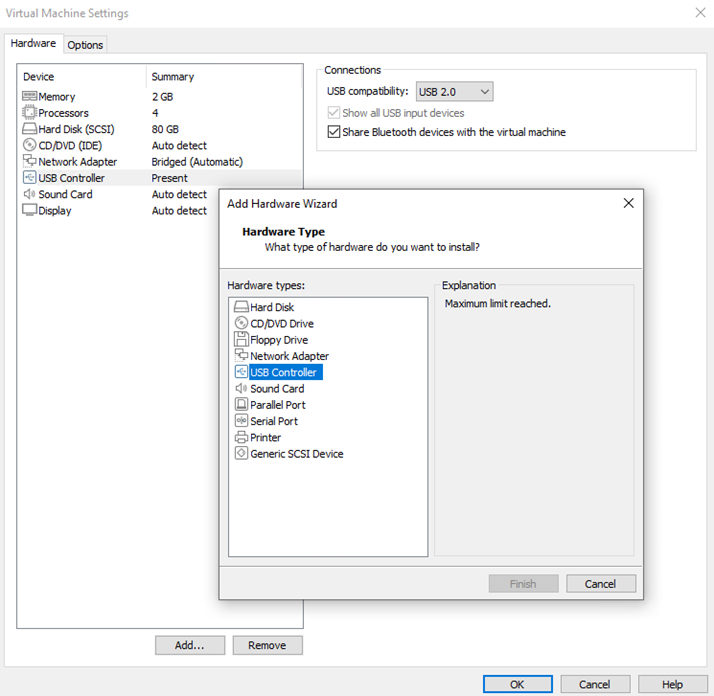
We also want to ensure that the box that reads, shows all USB input devices, is checked under the Connections options. We may also check the second box if we are interested in sharing Bluetooth devices with our virtual machine. The last option is to select the USB version which could be USB 2 or USB 3. Once we are satisfied with the selections we will click ok to save the changes and exit the settings window.
Now that we are done making the configuration changes on the USB settings, we will proceed with powering on the virtual machine. We will then wait until the machine finishes booting up before we insert our USB-based wireless/wi-fi adapter into the host machine. Once it is plugged in, we will get the below pop-up message. The message will ask us to choose whether we want to connect the USB device to the host or to the virtual machine.
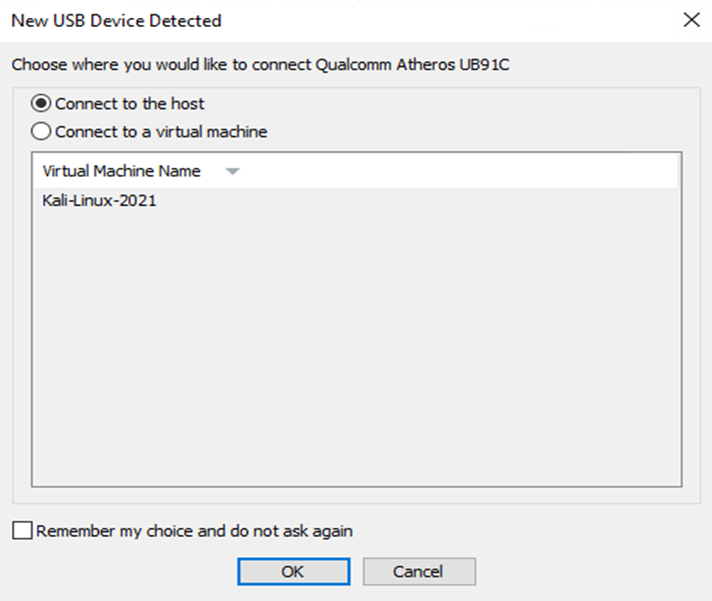
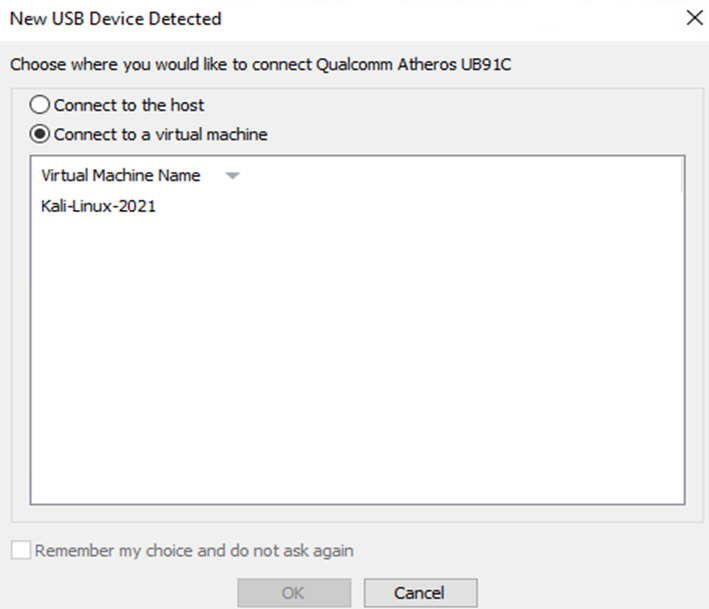
In our case, we select the second option which says “Connect to a virtual machine” which is also listed under the virtual machine name as Kali-Linux.
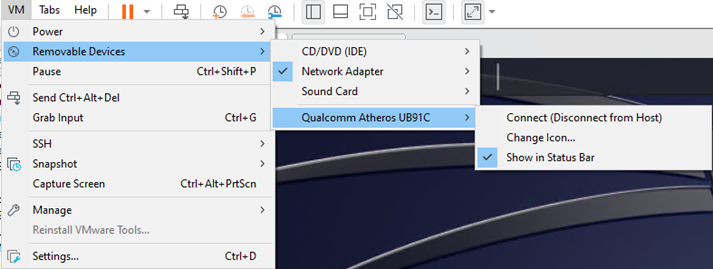
There is an alternative way when it comes to connecting to the USB-based device once we have our virtual machine powered up. To do this, we will click on VM > Removable Devices > “Name of the USB device” > Connect (Disconnect from Host).
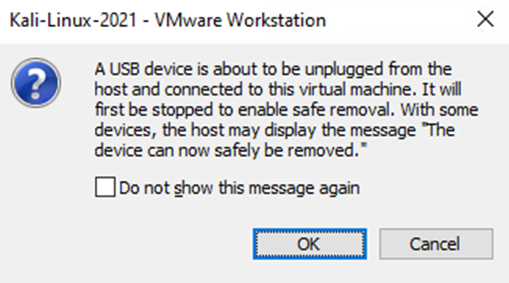
Once we click on connect, the below window will pop up. At this point, we will click on ok which should then allow the virtual machine to connect to the USB device.
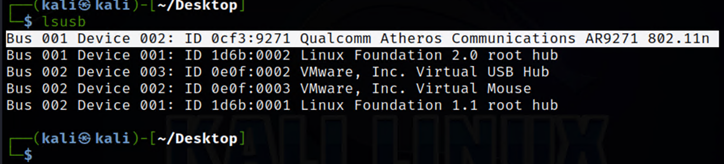
To check which USB devices are connected to our virtual machine, we can use the lsusb command that is illustrated below.
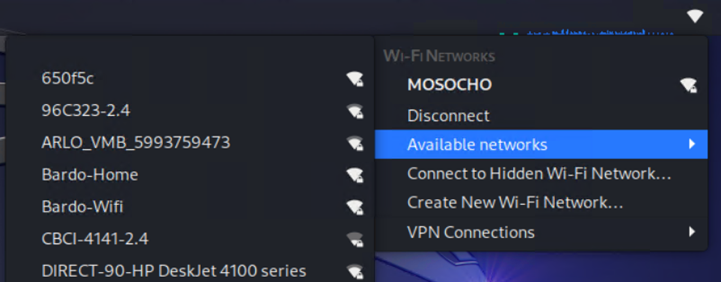
In the case of our Wi-Fi adapter, you can see in the screenshot below, our Kali Linux machine now has wireless network connectivity and the available Wi-Fi networks are also being displayed.
We can use the terminal to verify whether we indeed have an IP address associated with the wireless interface card named wlan0. To do this, we will open a terminal and then type the command below:
ip address

The output shown in the above screenshot shows that we do indeed have an IP address of 192.168.1.237 that is associated with our Wi-Fi network. Another command for verifying wireless connectivity is:
iwconfig
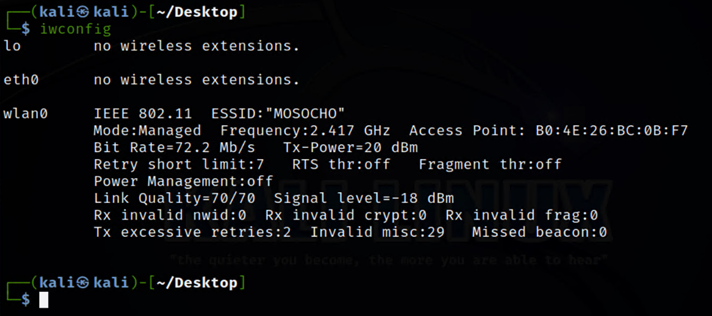
The above output provides more detailed information about the Wi-Fi network we are connected to. This information includes network name, signal strength, speed, access point, and so on.
Conclusion
In this article, we went through the process of connecting a USB device to a virtual machine running on the VMware Workstation hypervisor. In particular, we configured the settings of a wireless/Wi-Fi USB-based adapter and used it to connect our Kali Linux virtual machine to a wireless network. We highlighted the different ways to connect the virtual machine to the available USB devices and some of the commands that can be used to verify connectivity via the terminal.


