In this article, we will demonstrate the necessary steps needed to connect a Kali Linux virtual machine (running on VirtualBox hypervisor ) to a Wi-Fi network. This approach works with USB-based Wi-Fi adapters. The name of the wireless USB adapter that I use in my network is called: Alfa AWUS036NHA 150Mbps Wireless USB Adapter. Below is a link to the product on eBay.
https://www.ebay.com/p/1600491254
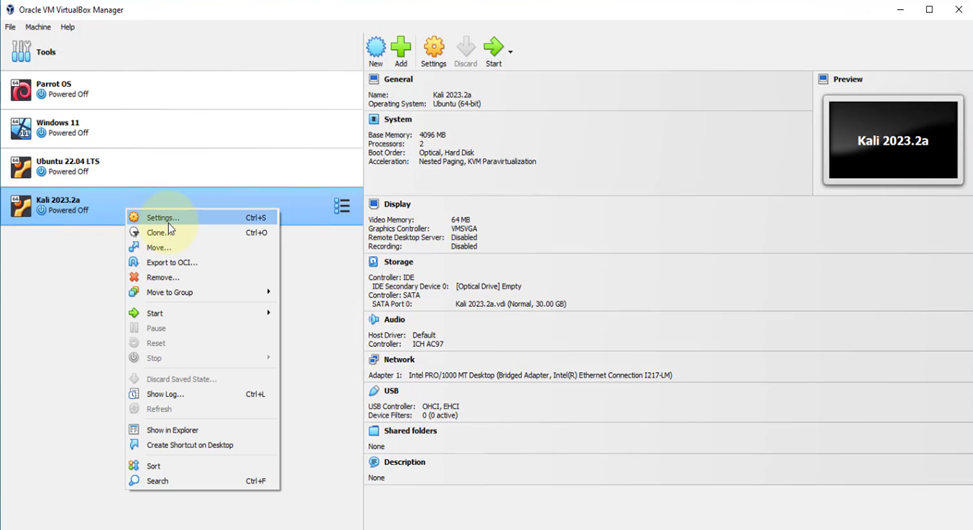
The first step involves making a few changes to the settings of the Kali Linux virtual machine. To do this, we will right-click on the virtual machine as shown in the picture below. We will then select the settings options. A new window for the settings should pop up.
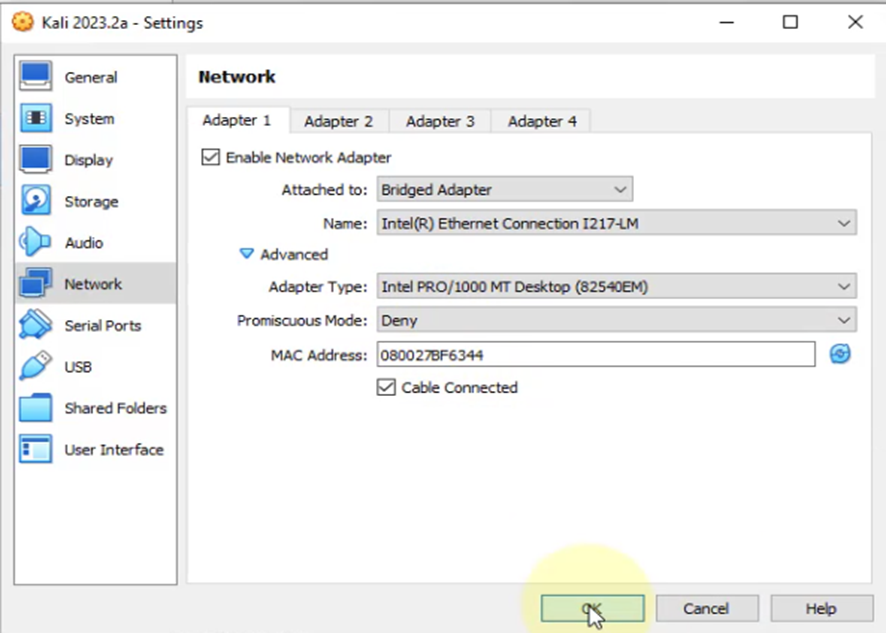
In the settings window, we will select the Network option on the left column. Next, under Adapter 1, we will ensure that the ‘Enable Network Adapter’ option is checked. For the ‘Attached to:’ option, we will go with ‘Bridged Adapter’. The rest of the settings can be left at their default. I have provided an example of what I have set on my Kali machine in the picture below. Once done making the changes, we will click on OK to save the changes and close the settings window.
Now, we can start/power on the Kali Linux virtual machine. We will log into the virtual machine once it has completed the bootup process and then we will proceed to open the terminal. Before we connect to the Wi-Fi network, we can check what network interfaces we currently have. We will accomplish this by running the below command on the terminal.
ip address
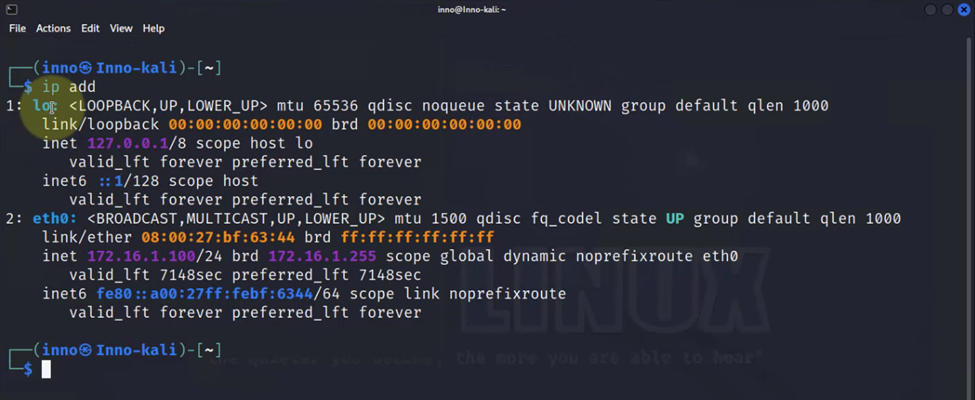
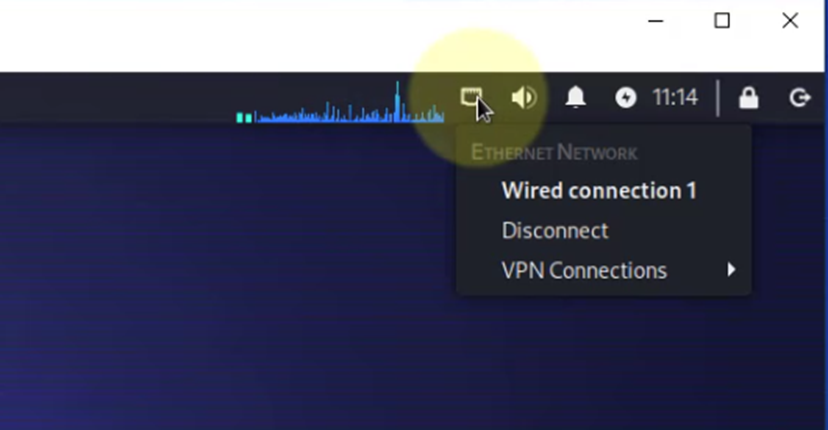
The above command will list the network interfaces and their associated IP address. Based on the output, we can see that we only have two interfaces: the loopback interface and interface eth0. At this point, we do not have any wireless networks showing under the listed interfaces. Also, if we right-click on the ‘Ethernet network connection’ icon on the top right of the menu, we will not see any Wi-Fi/wireless networks listed.
The next step is to attach the wireless USB device via the device settings under the Devices option located on the top left side of the menu bar. We will select Devices from the menu and then click on the USB option. Next, we will click on the name of our wireless USB adapter that will show under the USB option. In the below picture, the name of the adapter is listed as ATHEROS UB91C [0108]. We may have to repeat the above step twice.

We can ignore the below error message if we receive one: “Can’t attach USB device”.

Once we have successfully attached the Wi-Fi/wireless adapter that we are using, we will see a spinning icon under the ethernet network connections as shown below.

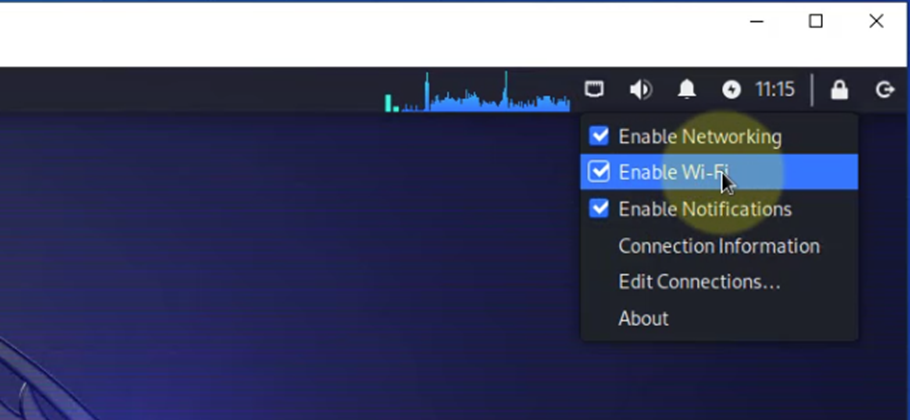
Once that is completed, we can right-click on the ethernet network connection icon and should now see an option to Enable Wi-Fi. See picture below.
If we left-click on the ethernet network connection icon, we should now have an option that says, Available networks, that appears the Wi-Fi Networks as shown below. If we click on this option, we should see a list of the Wi-Fi networks that are within our range.
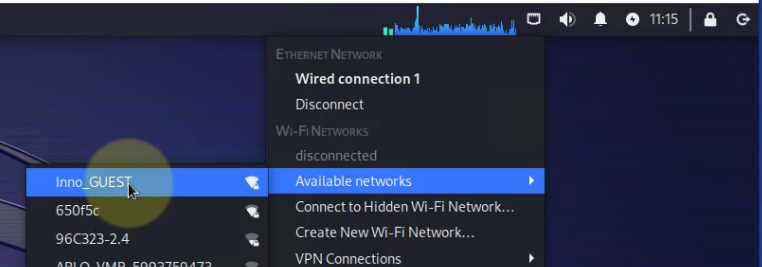
From this list, we can select our Wi-Fi network and a new window should pop up asking for the password for that wireless network. See the example below.

Once we have input the correct password, the Kali Linux machine will be connected to the wireless network. The Kali virtual machine should also receive an IP address from the wireless router. We can confirm this by opening a terminal and entering the below command that we used earlier.
ip address
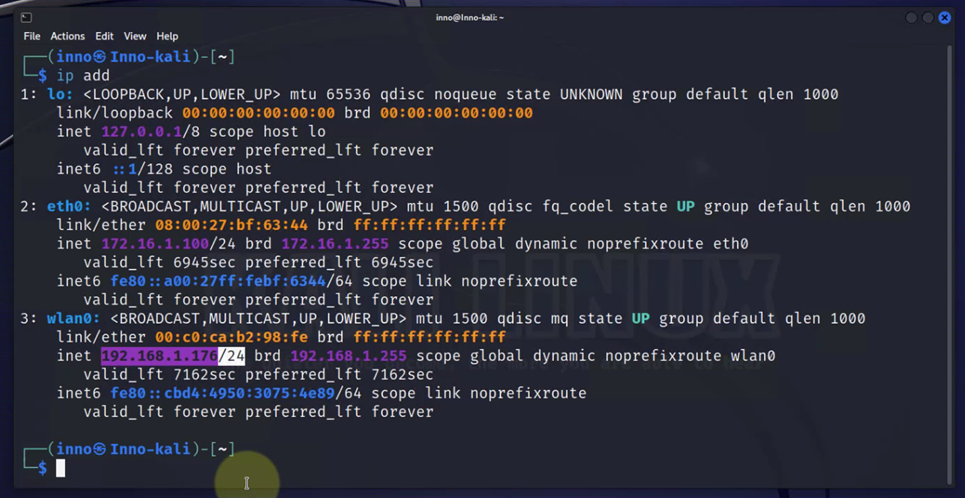
In this case, we can see that a new network interface referred to as wlan0 is now showing under the list of network interfaces on our machine. We can also see that this interface has a valid IP address of 192.168.1.176 that was assigned by our wireless router. This confirms that we have successfully connected our Kali Linux virtual machine to our wireless network.

