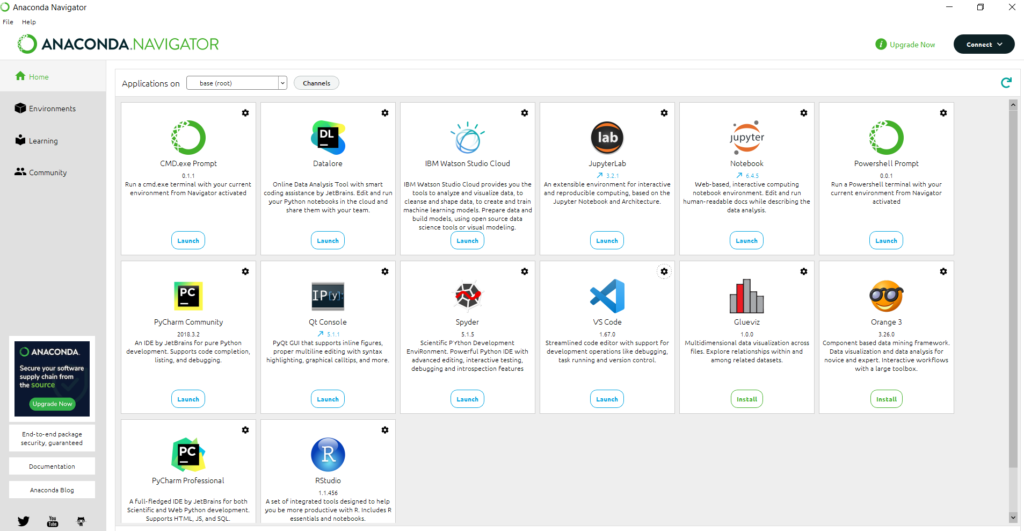
Whenever you want to use VS Code to write Python, it may be preferable to open VS Code from within Anaconda Navigator rather than from the Launch Pad or Start Menu. This way, VS Code will point to the version of Python that comes with Anaconda. To open VS Code, first, open Anaconda Navigator then click on the launch button under the VS Code icon.
Settings to check on VS Code
To change the color theme, you can click on the ‘Manage’ icon (bottom left) of the screen, then select Color Theme. There is a second way to get to the Color Theme: first select file under menu items, then go to Preferences and then select Color Theme. Here, you will find the different options that you can try before selecting the color that you like.
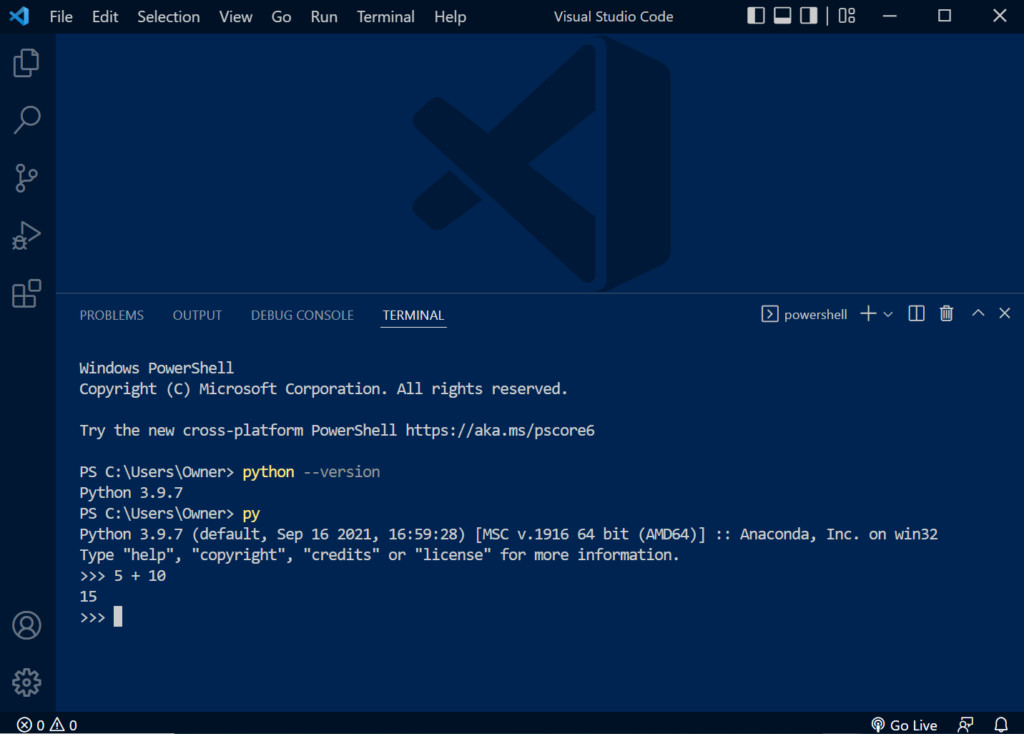
Before writing code in VS Code after a new install, it is important to ensure that the Python interpreter is set up correctly. A quick check can be performed inside VS Code’s terminal. If you do not see the terminal window, select terminal from the menu item and then click on New Terminal. You can move the terminal to the right by right click on menu bar of terminal and then selecting the option to move panel to right or left. The terminal can be closed by clicking on the x or the delete icon found on the top right.
The version of Python can be checked by typing ‘python –version’ inside the terminal (if you get an error, the interpreter settings may need to be verified). To enter the Python interpreter (or Python prompt), type ‘py’ and press enter. To test functionality type 5 + 10 in the terminal and press enter (should give a result of 15) this confirms that the Python development environment is setup correctly and ready to go. To close or exit the Python interpreter, press CTRL + D or type exit().
Creating a Python Development Workspace
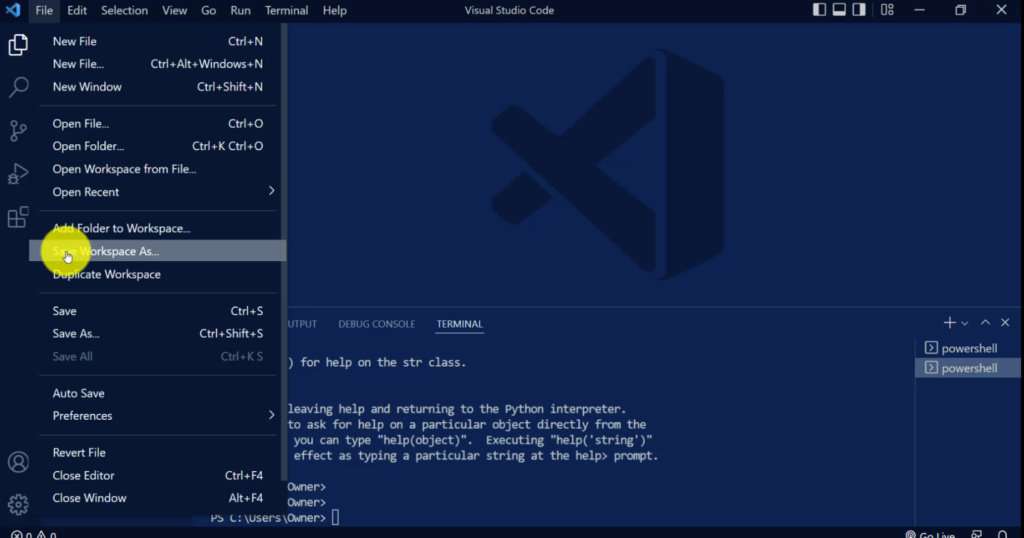
The term ‘Workspace’ is used by VS Code to define a development environment. The environment comprises of the Python interpreter in additionally extensions you are using with Python. It is recommended to set up a VS Code development environment for precisely learning Python coding. This environment can be separate from other languages such as HTML and JavaScript. The development workspace can be stored in a folder located on the local hard drive or remotely on OneDrive. To create and save a workspace, first select file from the menu, then click on Save Workspace as, and navigate to whatever location or folder you want to save the settings for your workspace.
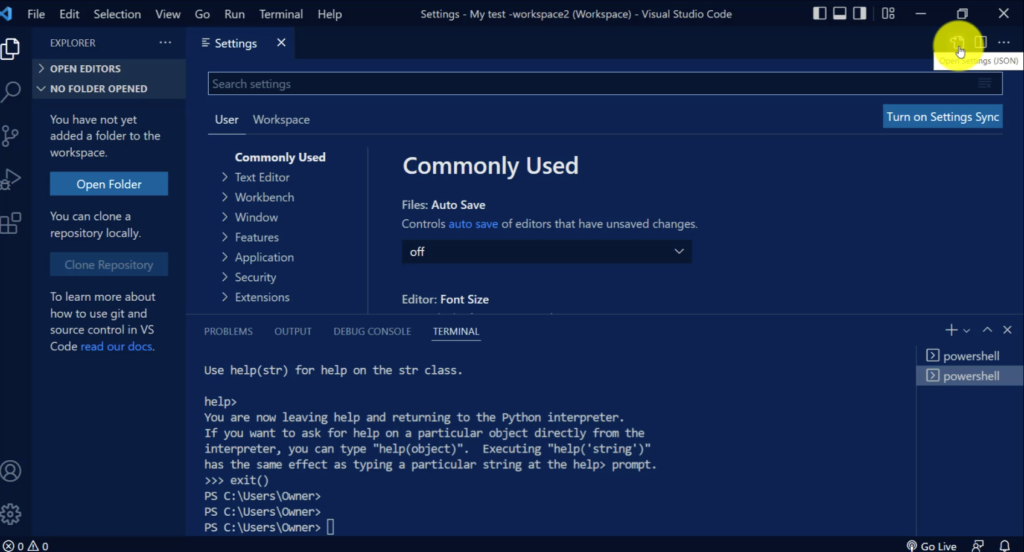
The next step is to modify the settings of the saved workspace: select file from menu, go to Preferences, and then select settings. Click the Open Settings (JSON) icon near the top-right corner.
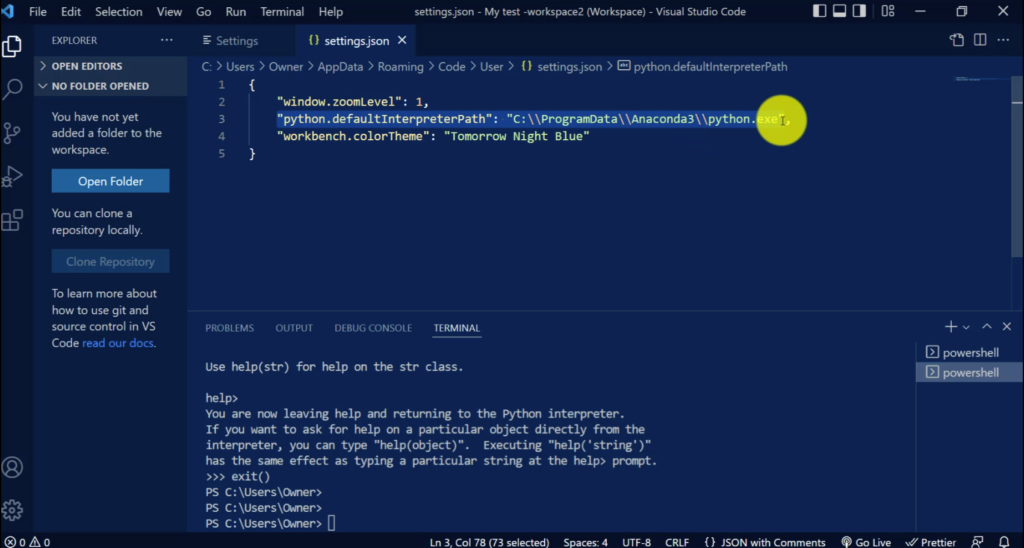
In the next window that open up (titled ‘settings.json’, select the entire line of code that starts with python.pythonpath (this line tells VS Code where to find the Python interpreter on your computer). You may also select any other lines that you would like to make part of the new workspace. Right-click the selected code and choose Copy to copy it to the clipboard.
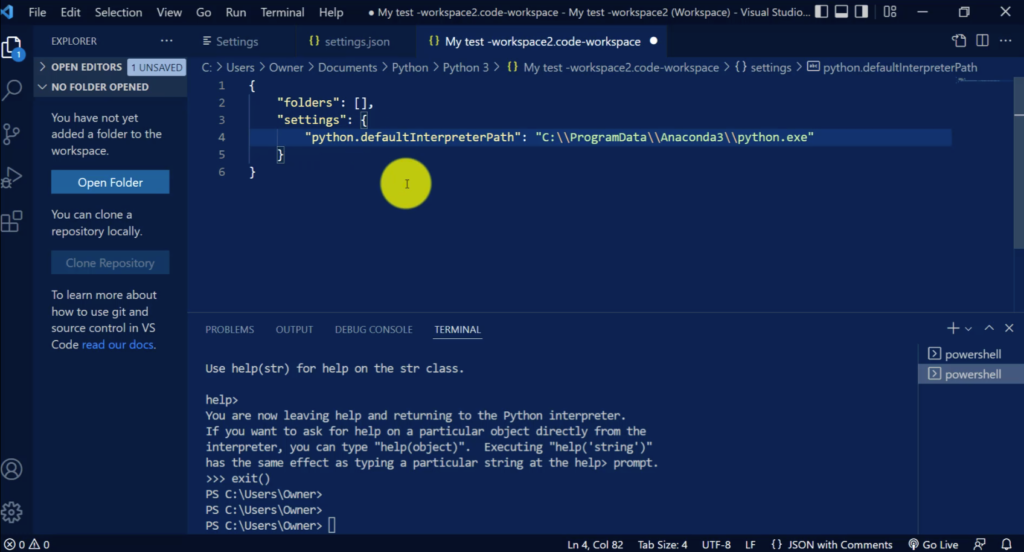
To edit the setting of the newly created workspace, from the menu choose view then select Command Palette. Next type ‘open workspace’ and then select ‘Preferences: Open Workspace Settings (JSON).’
Inside the settings window, click between the setting’s curly braces and paste the lines of code here. To save the settings, click file and then select save from the VS Code menu. To close the settings tabs, click on the x on the tabs.
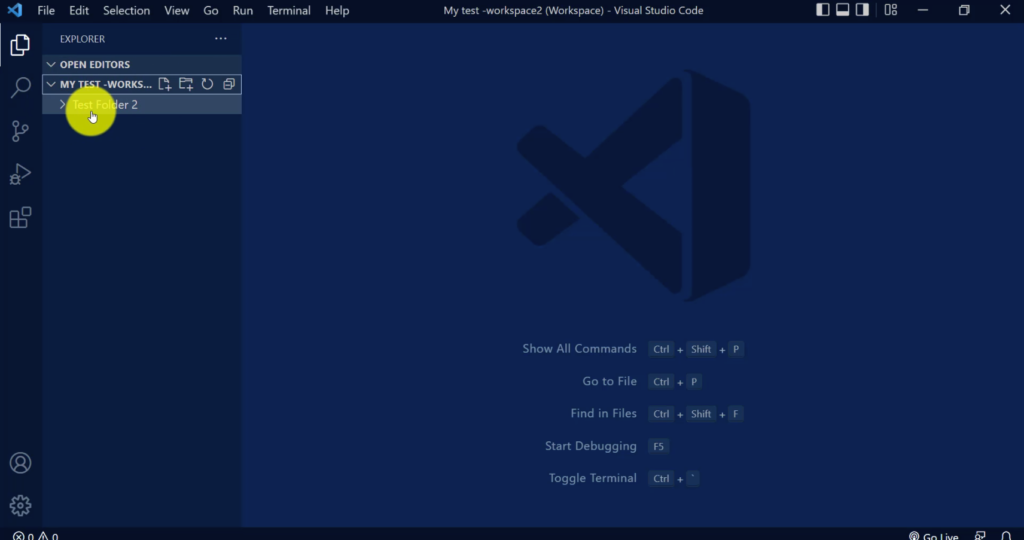
The next step is to create a folder that will store all the Python code and will be associated with the newly created workspace. The folder can be stored locally or remotely. Navigate to the location where the folder will be created and create a new folder and give it a name. Now to associate the folder with the VS Code workspace and its Python settings, ensure that the new workspace is open by selecting file then clicking Open Workspace. From there, navigate to where you saved the new workspace and open it. To associate the folder for storing Python code, click file then select Add Folder to Workspace. Navigate to the location where you created the folder for your Python code, click that folder’s icon, and choose Add.
Open VS Code’s Explorer pane (top left) and the new Python folder should show under the new workspace’s name. Since this is a new folder, there is no files listed under it.
Typing, Editing, and Debugging Python Code
In order to start using VS Code’s code editor to write Python code, you will need to create a new file under the Python folder. Every Python code file will be a text file that has an extension of ‘.py’. To create a file inside the Python folder, right-click on the folder’s name and select New File. Give the file a name and ensure it ends with ‘.py’ before pressing enter. The file should show under the folder and also open under a new tap.
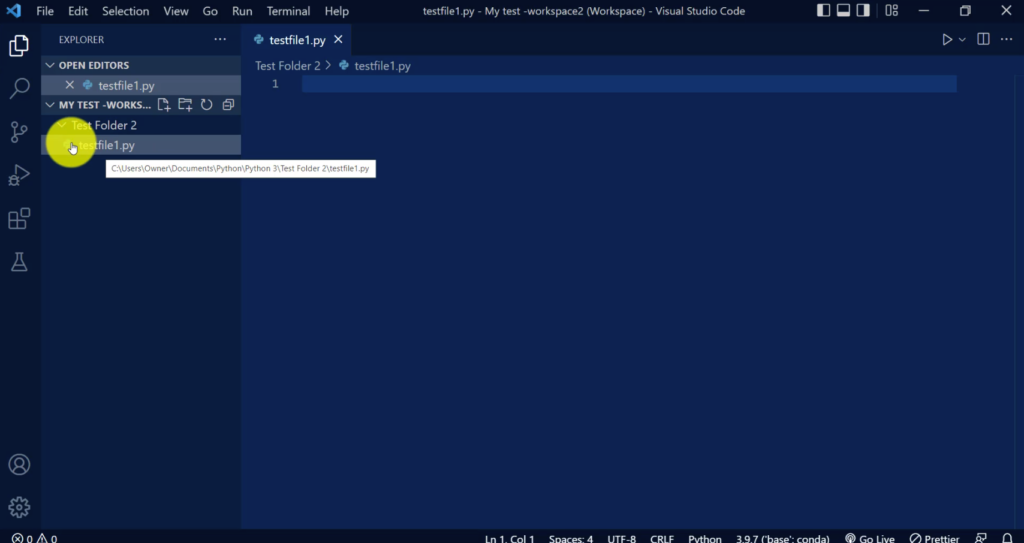
The space under that tab is the editor in which Python code can be typed. Once you have typed your code inside the editor, you will see a dot displayed next to the name of the file. This indicates that the file has unsaved changes. To save the changes, press Ctrl + S or choose file from the menu and select save. You can also select Auto Save from the file menu to ensure that any changes you make are save automatically.
To test you code, you can run it by clicking on the run icon on the top right.
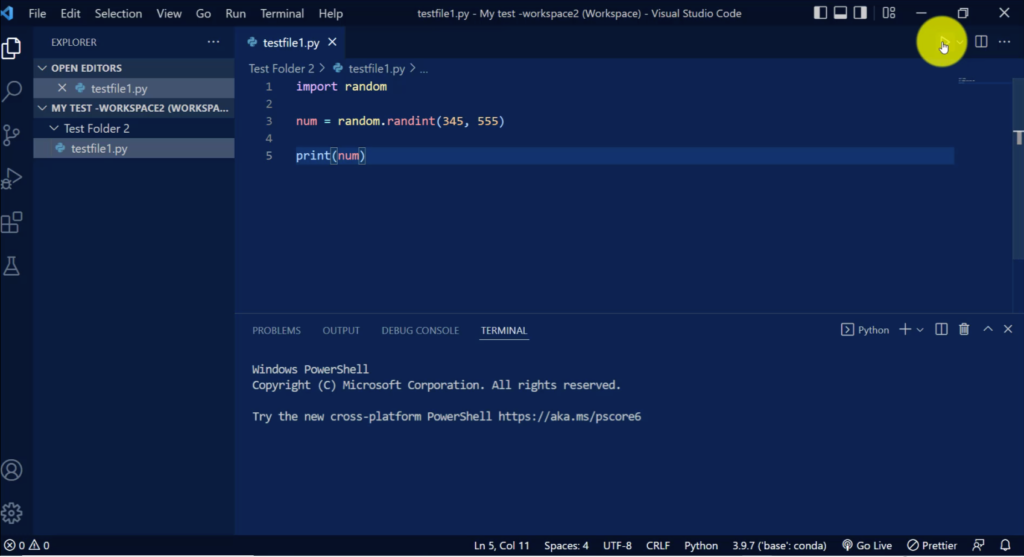
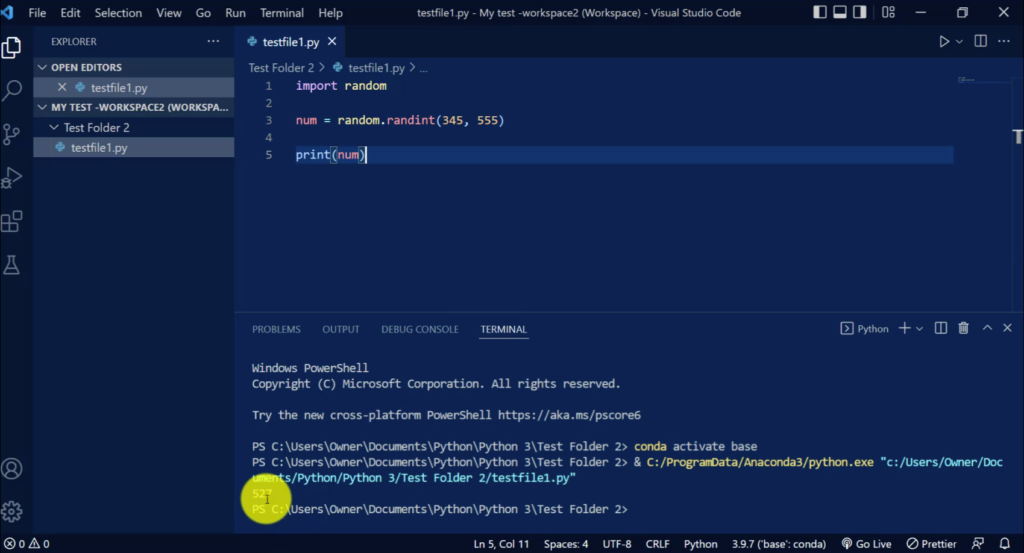
Once the run icon is pressed, the terminal window will open at the bottom of VS Code’s window. Here you will see the results of your code. If there are any errors your code, that will be shown in the terminal as well.
Why go through all these steps?
The process of setting up the VS Code workspace is beneficially, especially for those individuals that use VS Code to code in more than on programming language. The workspace makes it convenient to organize different files and settings for the different environments. For instance, to open the workspace for just Python, all one has to do is launch VS Code from within Anaconda Navigator and then navigate to the workspace (by selecting file menu then selecting open workspace). After opening the workspace, all the associated folders and files will also be opening under that workspace.

